Marantz Model 9 Vintage Tube Monoblock Amplifier (Single) THE Holy Grail Ear
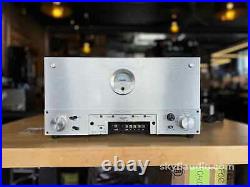
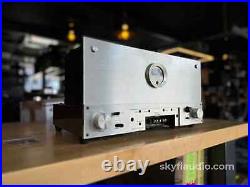
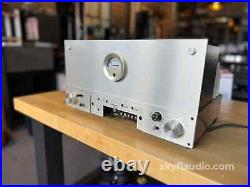
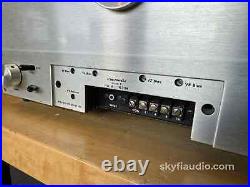
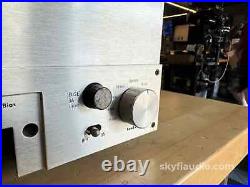
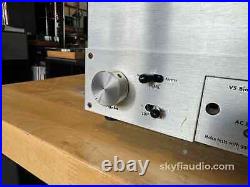
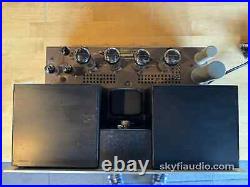
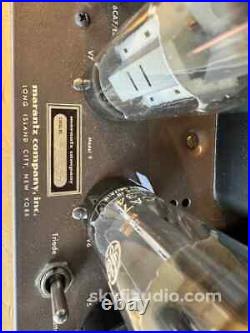
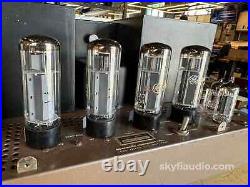
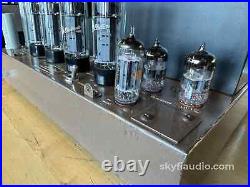
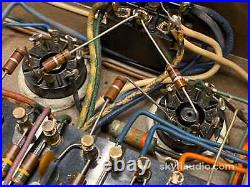
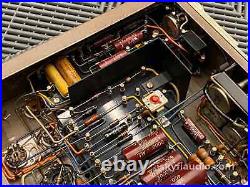
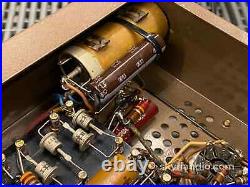
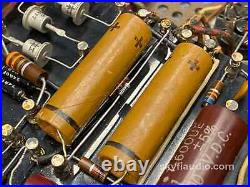
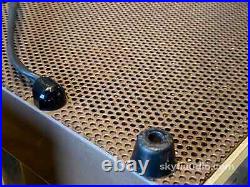
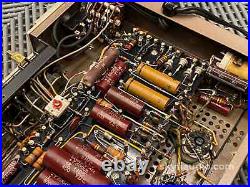
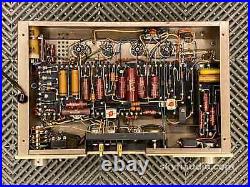
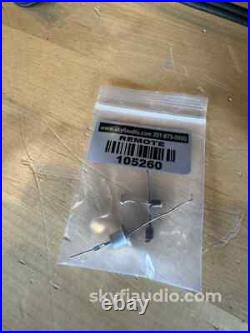
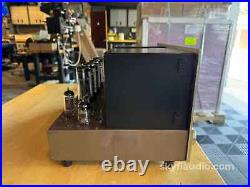
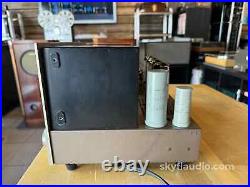
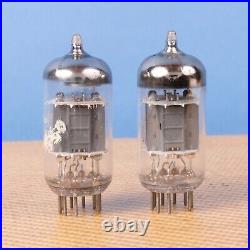
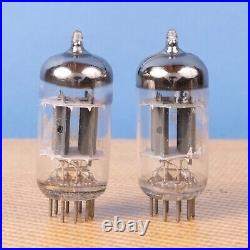
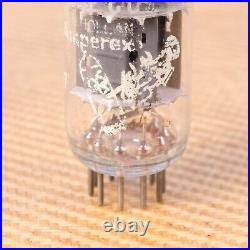
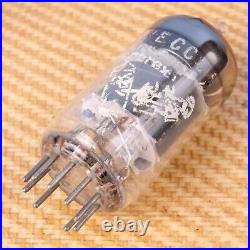
Tuesday, July 30th, 2024Marantz Model 9 Vintage Tube Monoblock Amplifier (Single) – THE Holy Grail – Early Serial. General: This is a unique opportunity to own one of the most coveted pieces of audio history. The Model 9 was the top of the line for Marantz in the late 1960′s, and while they do come up for sale on occasion, they are fairly rare. We’ve only had the pleasure of having one or two sets here at SkyFi. This listing is for a single unit, perfect for someone looking for a matching sock :- or setting up a mono system that’s so popular these days. To match this unit with a later production one you would need to slightly adjust your balance. While we have a second Marantz Model 9, they were too far apart in production dates to sell as a pair. Most shops would do just that and it’s likely the new owner would never notice much of a difference other than a slight gain variation. But that’s not how we roll. Physical condition is above average. No signs of heavy use or abuse anywhere to be found. All paintwork and writing is intact and original! Incredible when you realize this is nearly 60 years “young” in age. This amplifier also includes a very desirable set of replacement tubes consisting of current production Russian 6922, an Amperex branded GE 6CG7, and a set of strong testing matched Mullard XF4 EL34s with various brand markings. The Model 9 clocks in at 63 lbs, offers 70 W, and can push up to 40 W in a user selectable Triode output mode. Please see our photos for a copy of the original Marantz 1960′s advertisement with full specifications. Note this Model 9 is not the re-issue amplifier, but rather an original vintage unit from the 1960′s. Description Using EL34 tubes, this ultra-linear parallel push-pull design produced 70 watts of power, a significant accomplishment for its time. The increased power resulted, in part, from the strong rivalry with McIntosh, whose power amplifiers (at the time) were generally more muscular than comparable Marantz models. It’s worth noting that the MODEL 9 can also be set in triode operation for even better sound at lower wattage. In addition to its high power, the MODEL 9 reached new cosmetic horizons thanks to a bias meter centered on the front panel and a drop-down front panel door that concealed adjustments and connections. Until then, Marantz products had been more industrial-looking devices designed to be hidden away, but Saul was coming to realise that the audiophile was as equally as concerned about interior design, and that highend audio equipment was something that should be put on display. Mid-century design and architecture is one of the most significant design movements to date. It was during this period that folks began to care more about how their homes looked, and indeed about how their music sounded. Bauhaus had infiltrated New York, while designers like Eames, Bertoia, Saarinen, Wright, and Le Corbusier were creating aspirational products and places. The MODEL 9 was designed to align with, and perhaps accentuate, such sought-after statement pieces, and the certain lifestyle they represented. Built on Heroes of the Past In 1960, Paul Simon, Neil Diamond and Lou Reed were New York’s most exciting young artists. The computer mouse, etch a sketch, countertop microwave oven and the audio cassette had just been invented. Thanks to the efforts of guitar hero Les Paul, multitrack recording had become standard for both consumption and recording. His company, Ampex, had created the eight-track studio recorder, enabling people to record instruments separately and mix them into one cohesive composition, and so music lovers were looking for technologies that could accurately reproduce those recordings. Since 1953, Saul Marantz had been developing a series of amplifiers from his home in Kew Gardens, Queens. Having found success with his audio consolette, Saul evolved the product into the MODEL 1, which, with a great deal of tinkering became the MODEL 2, and so on, until in 1960 he released the MODEL 9, a groundbreaking new amplifier. Yet the MODEL 9 was more than just a looker. It was one of the first amplifiers to use a meter and knob to perform different test functions (at gain zero). It is equipped with trimmers to adjust the bias of every output tube, but also to set AC and DC balance, which was of course incredibly convenient for the user at that time as it meant that no scope or other testing equipment was needed. And such was the amplifier’s smooth control and stability of power, NASA famously customized the MODEL 9 for use in the Apollo Space Program. Again, it is Saul’s understanding of mid-century design that has meant the porthole has stood the test of time. It is iconic today, as it was 60 years ago. Like many products at the time, self assembly was required, partly in the interest of keeping the price down. Each unit came with a manual, test card, and schematic diagram, as well as an accessory kit containing an assortment of screws and an Allen key. The instruction manual goes on to say, The MODEL 9 is remarkably cool in its normal operation. Admittedly it does then warn that any amplifier will become hot if not allowed to freely dissipate itself into the surrounding air… But still, it is remarkably cool. SkyFi Cosmetic Notes: This unit has a handful of cosmetic blemishes including marks on the faceplate and chassis. It is also missing its top cover and front control cover. SkyFi Technical Notes: This unit came to us in all original condition but a had a couple of issues. In the spirit of keeping this unit as original as possible we opted to only replace the components that had failed. We replaced a blown screen grid resistor, the bias diode, and one of the large chassis mounted electrolytic capacitors (under chassis). We fitted the unit with a set of replacement tubes consisting of current production Russian 6922, an Amperex branded GE 6CG7, and a set of strong testing matched Mullard XF4 EL34s with various brand markings. Ownership: Unknown General Sound: Neutral sound with little to no coloration Cosmetic Condition: 6/10 = Fair. Three to four minor scratches, or one major scratch. Working Condition: Working perfectly and tested in our lab and listening room. Included: Just the unit and power cord. Packing: Will be packed using our highly developed in-house process and custom packing materials. We start with a visual inspection of all internal components to make sure that there are no signs of heat stress or damage. Capacitors are checked for telltale signs of predictive failure including bulging, shrunken wrappers, or physical leakage. We also inspect the PCBs for discoloration from resistors or transistors that may have been running hot. On vintage units we often spot check select capacitors for value and ESR. If the amplifier passes visual inspection, we move on to a controlled power on sequence using a Sencore safety analyzer to monitor current draw in real time. Once the amplifier is determined to be safe to operate, we connect it to full AC mains for function and power testing. We connect the speaker outputs of the amplifier to a Sencore PA81 Power Analyzer which acts as a dummy load, DC offset monitor, and oscilloscope interface. We start with a low level 1 KHz test signal at the amplifier’s input and slowly increase its amplitude while monitoring the output on an oscilloscope for signs of noise, clipping, distortion, or improper channel balance. We continue increasing the signal level until the amplifier reaches clipping. At this point we take an output power measurement and compare it to the spec sheet of the amplifier to verify proper performance. If the device under test has both balanced and single ended inputs they are both tested at this time. We finish off the bench evaluation with a 1 KHz square wave check and a 20 Hz to 20 KHz sine sweep to assess the amplifier’s frequency response characteristics. This battery of tests will usually reveal if the amplifier has any issues that need further attention. Before the device leaves the bench, we perform a listening test with actual music using a variety of preferred test tracks. Our benches are outfitted with familiar monitor speakers which help us identify inconsistencies that will not always show up on our test gear. The main things that we are listening for are hum or noise with no signal present, proper center image, clicks, pops, or any other obvious undesirable audio characteristics. If the unit passes all of these tests it is moved to our long term testing rig where we simulate real word operating conditions for 6-8 hours minimum. This allows us to monitor the unit for signs of thermal runaway or intermittent issues that only crop up when the unit has fully come up to temperature. We also inspect resistors and other passive components for signs of overheating. If tube arcing has occurred in the past we can usually spot discoloration on the output tube sockets. If the amplifier passes visual inspection, we move on to a full test of all of the tubes. We use a modern Amplitrex AT-1000 Professional Tube Tester which is capable of testing both emission and Gm with a high degree of accuracy. We document the results of each tube and replace any weak or suspect tubes before proceeding. When we power on tube amplifiers for the first time we usually use a variac and current limited AC supply and slowly raise the voltage up to nominal mains level while monitoring plate, screen, filament, and negative bias supply voltages where applicable. If everything is in order we feed a low level test signal into the amplifier’s input and monitor its output on an oscilloscope across an 8 ohm dummy load. At this point we are just looking to verify basic function and confirm that the output transformers are not damaged. Once we have verified that the amplifier is safe to operate, we connected it to full mains power. For cathode biased amps we monitor the plate to cathode voltage to determine if the output tubes are operating in a safe range. Once the output section is verified we move onto bench evaluation. We start by feeding the input of the amplifier with a low level 1 KHz test signal, slowly increasing its amplitude while monitoring the amplifier’s output on an oscilloscope for signs of noise, clipping, distortion, or improper channel balance. Before the device leaves the bench we perform a listening test with actual music using a variety of preferred test tracks. For tube amps we like to run this test at least twice. This allows us to monitor the unit for signs of thermal runaway or intermittent issues that only crop up when it has fully come up to temperature. We find this step to be essential, especially for vintage units. SkyFi Audio – Curators of Vintage Audio Gear. No mid-fi, no gimmicks, no junk. Each piece of equipment is cosmetically restored and fully tested in our well-equipped lab by an engineer with 30+ years of experience in the HiFi world. Please note we are not a repair shop and only restore what we own. If we don’t have the original packaging, we use heavy-duty double-ply corrugated boxes with custom made to your item SealedAir Instapak expanding foam custom inserts. In many cases this has proven to be better than the original packaging! We also use high quality fiber reinforced tape to seal our packages. We have too many items for sale and it’s nearly impossible to keep track of offers outside of the official system. Our items are available for pick-up. No additional information at this time. You might also like. Dynavector 10×3 High-Output MC Phono Cartridge. Music Reference RM-5 MK II Tube Preamplifier with Phono. Music Reference RM-9 Tube Amplifier With EL34′s.
